 | ||||||||||||||||||
 |  |  | ||||||||||||||||
 |  |  |  | |||||||||||||||
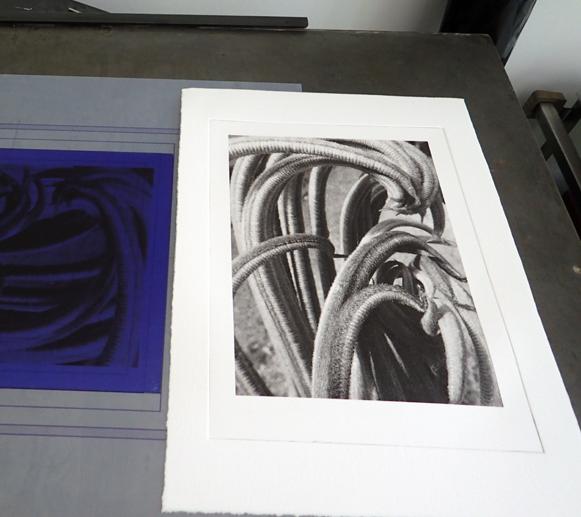
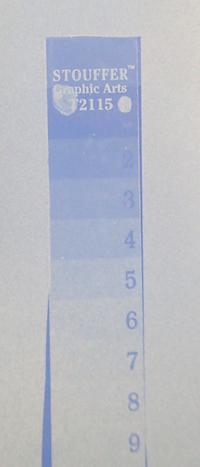
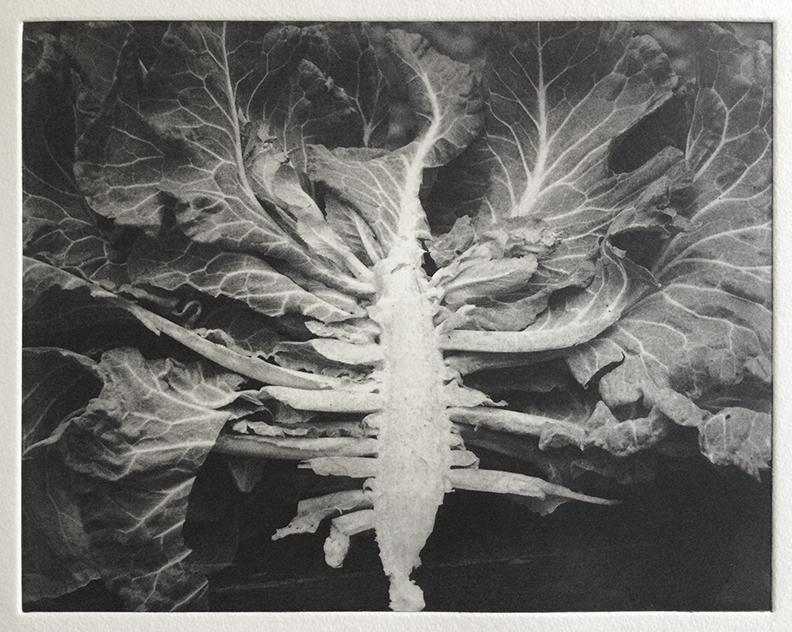
SKYLIGHT Photopolymer Processing Instructions by Cape Fear Press Please read all directions because they differ from other photopolymer processing methods. Processing SKYLIGHT is fast and simple. By following all of the steps and tips given here you should achieve excellent results. ©2018 All Rights Reserved. SKYLIGHT is a thicker film intended for non-etch photo intaglio applications. It is also good for photo etching lower resolution imagery and can also be used as an electro-plating mask. Materials needed: PREPARING A METAL PLATE A clean plate is VERY important for adhesion and all traces of cleaners or brighteners must be removed. If plate is dull dirty or oxidized, mechanically clean with a metal polish first. Next, clean and degrease the plate with solution of TSP until the plate rinses grease free with a solid sheet of water. Dissolve 1 part TSP in about 8 parts warm water in a wide mouth container. Use a thick nylon paint brush dipped in the TSP and work this over the surface of the recently polished plate. Rinse in cold water and repeat the degreasing with TSP if the water does not sheet. Thoroughly rinse this in cold tap water and dry with paper towels. Laminate resist immediately to avoid oxidation of the plate. Note: It is not necessary to abrade plates for adhering SKYLIGHT, a smooth finish is preferred as it does trap excess moisture. PREPARING ACRYLIC SHEET If the sheet is new, remove the protective film and wipe down with isopropyl alcohol and a paper towel. If you are re-using the plexi, remove all traces of photopolymer with TSP. Rinse and dry the plexi with paper towels and isopropyl alcohol. LAMINATION Wet lamination is recommended for a smooth, bubble free adhesion to your plate material. Cut a piece of film slightly larger than your plate. Fill a spray bottle with distilled water and mist the surface of your plate evenly. The film is sandwiched between two layers of protective mylar. Unroll the film onto a spare piece of a very clean but wet sheet of plexi with the dull side up. Remove the dull inner mylar by scraping at the surface near a corner with a push pin. Peel the liner away. Mist the film liberally and spray your plate to be laminated as well. Transfer your film to the surface, try to let it lie down progressively leaving no bubbles. If there are wrinkles anywhere, lift film there quickly to remove them. Use a wet sponge on the top side of the film to gently smooth the film onto the plasic from the center outwards in all directions. Once the film appears evenly smoothed down all over, use the squeegee from the center outwards with light pressure first, then firm. Trim film to the edge of the plate with a sharp blade. Squeegee film more if necessary and dry with paper towel. See Puretch Video 1 for basic wet lamination technique. DRYING WET LAMINATED PLATES Let the film dry in a dark room with 65% or less RH. The lower the RH is, the the quicker the drying time will be and air movement from a fan will also speed drying. It is best to lay plates flat for drying, un-stacked as propping plates on edge can sometimes cause film de-lamination or contamination at that edge. Plates will dry this way in as little as an hour depending on RH. Plates can also be left to dry overnight. For quicker drying, place the laminated plate on a hotplate that has a surface temperature of 120ºF. Cover plate with a piece of smooth drywall for 10-15 minutes and shim the drywall so it floats slightly above the plate. Let plate cool completely in darkroom before exposing. FILM POSITIVE Photopolymer film intaglio requires a fine halftoned image. A 360 DPI diffusion dithered bitmap works well for this process. Higher resolution bitmaps will work but a loss of range in the shadows will result. Fixxons waterproof works well for film positives. The black levels can be lightened to about 70-80%K to print black using a single image exposure without the need of a separate aquatint screen exposure. The black levels will not need as much adjustment if you are using a separate aquatint screen exposure. Always use Photo Black instead of Matte Black when using Epson printers. Use a printer driver like QuadtoneRIP or AccuRIP that allows you to print with black ink only. We use a QTR Default Ink Limit of 70 on the Epson P800. Your requirements may vary depending on Epson ink generation. EXPOSURE Test exposure with a 21 step Stouffer transmission wedge. See photo lower right for an example of a solid #5 exposure which is recommended for CTP, To expose halftone films or aquatint screens, expose to a solid #7. To test for CTP exposure tape the Stouffer to the top mylar and expose above the vacuum glass. To test exposures for film positive or aquatint screen, expose Stouffer in vacuum frame, no separate screen exposure is needed. The Stouffer image at the right was developed for 2 minutes with agitation only. Use the tables on the Stouffer envelope to adjust exposure up or down as necessary. A vacuum frame is recommended for high resolution halftone films and aquatint screens. Place film with ink or emulsion side toward the photopolymer in vacuum frame. Leave the top mylar in place when exposing film positives and screens. You should wait until you can see Newton rings under the glass in the vacuum before firing the lamp. Expose plate with a UV point light source (mercury vapor, metal halide, arc, or sun - not fluorescent tubes). The distance of the light source should be at least 1.5 x the diagonal of the plate. The CTP exposure with our NuArc 261K less than 2 minutes. TRAY DEVELOPMENT Wear rubber gloves to avoid getting dissolved plastics and photo chemicals on your skin. In a room with a bug light, pour room temperature developing solution (70-72ºF) into a tray. Carefully peel the protective mylar from one corner of plate, using a piece of tape to lift the corner. Make sure the mylar lifts without the resist. In one swift move, peel the top sheet from the plate. The top mylar should remove easily, leaving the film in place. If it does not, it may need longer drying times or humidity in studio may be too high. The best way to ensure even and complete development is by using rolled cotton to swab the plate. A 3x3" wad of cotton works well. Place plate in developer immediately after exposure. Agitate the plate and wet the cotton with the developer. Using just the weight of the wet cotton, lightly swab the entire surface of the photopolymer a few times and finish developing by agitation for about 2 minutes total. Alternately, develop by constant agitation of the tray for 2.5 minutes. Incomplete development will result in shadows that lack density or uneven tones. There should be a faint base of film remaining all over the intaglio plate which will ensure durability during the wiping process. Rinse plate well with cool tap water. Use a soft window squeegee or a clean damp chamois cloth to quickly remove excess water from photopolymer surface. Quickly blow dry with warm air. POST EXPOSURE Harden the photopolymer in sunlight or UV source until the resist turns a darker blue-purple. Dry the plate in front of a fan for 1 hour in 65% or less relative humidity to fully dry out the photopolymer OR cure it on a 120º hotplate under the weight of a piece of sheetrock for 10-15 minutes. The plate is now ready for intaglio printing. If your printing paper sticks to the polymer then the film has not been fully dried and hardened. PRINTING Use a rubber inking card (NOT mat board) or rubber roller to apply etching ink to the photopolymer. Wipe with a soft tarlatan. Stiff tarlatan should be rinsed and dried prior to printing until it feels lightly starched. PLATE CLEAN-UP Oil based inks can be safely cleaned up with any non-drying oil such as mineral oil, coconut oil or peanut oil followed by dish soap and cold water rinse. Do not use alcohol or dilute alcohols as this will dissolve the polymer. Wipe dry with s chamois or squeegee. Mineral spirits will also work. STRIPPING Exposed photopolymer can be stripped with the TSP degreasing solution or a 2-4% lye solution. Paint this onto the polymer with a nylon paint brush and wait about a few minutes for it to lift. Strain film solids with a sieve and discard into trash can. Rinse plate and dry with white paper towels. SAFETY SKYLIGHT Photopolymer is a very safe resist when used properly. Discard all mylar cover films in the garbage. Use all materials at your own risk! _________________ TIPS: FINE TUNING LEVELS FOR SINGLE EXPOSURE FILM POSITIVES The simplest way to hone in on the levels adjustments of your grayscale image is to convert this 100 step wedge to a diffusion dithered bitmap halftone (or send this grayscale file to AccuRIP for halftoning) and proof the print. The proof will show you the optimum K% of your shadow, midtone and highlights. Note the step that prints with max black, this will be how much the shadows need to be lightened to print as black. This amount is usually between 70 and 80%. Note the step that prints with a middle gray and this will be the required K% for your midtones. The midtone will normally shift to the needed position when you lighten the black level. While adjusting the levels of the grayscale file, check the adjustments with an inkdropper in the info window of Photoshop. Highlights can also be darkened to give a faint dot all over but this is usually not necessary if the ink limit and exposure is correct. Once gray levels have been adjusted, convert to halftone. Expose tostep 7 on the Stouffer 21 wedge. PLATE SIZE TO IMAGE ON FILM If you notice that the edges of the image positive are lifting and not making contact in the vacuum causing them to fog then it may be necessary to make a 3/4" wide white margin around the image. This white border can be printed as is or it can be trimmed before printing. The image positive can also be cut slightly smaller than or to the same sizeas the plate size to prevent this problem. You can also cut 1-2" wide acrylic strips of the same thickness of your plate to butt up against the edges of your plate so you can bleed the image to the edge smoothly. This is especcially helpful if you like to write notes on the margins of your films. May 2023: DOUBLE EXPOSURE WITH AQUATINT SCREEN AND 133 LINE HALFTONE FILM (see Collards print below) My current preference with Skylight is to make a fine halftone using a round dot as this produces a visually smoother image than diffusion dithered halftones which use the same size dots all over. This produces a print that is very similar to a line screened rotogravure which makes intaglio cells of different widths and depths. A separate exposure with a screen will extend the usable range of your halftone output and will insure you do not over develop your shadows causing tone reversal. Set your grayscale image resolution to 2128 dpi and convert to Bitmap, for Method select Halftone... use 133 LPI as the frequency with a round dot at 45º. You will need to calibrate this halftone output for highlight, midtone and shadow levels adjustments. Expose both screen and halftone positive (in that order) for the same amount of time. Expose to step 7 on a Stouffer 21. CTP: Computer To Plate Printing with Skylight CTP printing is done by using an Epson printer with a front feed for poster board and a calibrated QuadtoneRIP profile that uses Photo Black only to print the grayscale image right onto the Skylight film. No bitmapping or haftoning of the image is required. The very fine dithering from the single ink cartridge provides the needed halftone effect which is extremely high in resolution. FREE QuadtoneRIP Profile for Skylight CTP and QTR CTP calibration wedge included with Skylight purchase. Please e-mail us with your order receipt for the files and printing info. QuadtoneRIP and QTR PrintTool required. Text and prints by Jennifer Page. All rights reserved. 2020© CapeFearPress.com | |||||||||||
 | |||||||||||
 | |||||||||||
 | |||||||||||
 | |||||||||||
 | |||||||||||
 | ||||
 | ||||
|
| ||||